Advanced Topics
Connect Your File Server
The way to connect the file servers are different, depending on where the file server is.
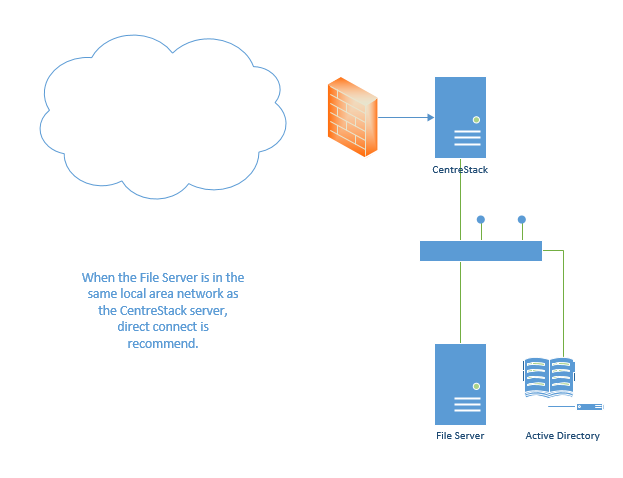
The file server can be sitting in the same Local Area Network (LAN) as the CentreStack Server. In this case, the direct network share connection is the best. Usually, this is combined with setting up a direct LDAP connection to the Active Directory.
FILE SERVER CONNECTION
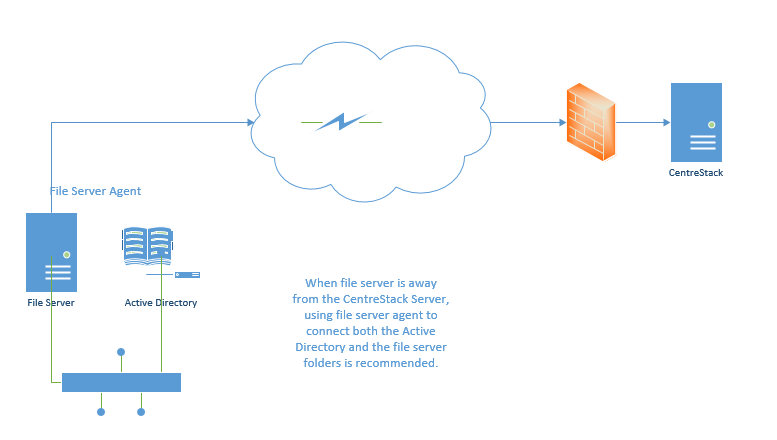
The file server can also be remote, away from the CentreStack server and at the customer’s premise. In this case, the best is to use a file server agent. File server agent will be installed on the file server, and it is capable of connecting the customer’s Active Directory and syncing both folder content and active directory over HTTPS. In this case, in the user interface, you will see “Proxied AD User” to indicate that the Active Directory user or group is coming from the file server agent.
SERVER AGENT CONNECTION
The best way to start using a file server agent to connect to a remote file server is to start with the migration wizard from the web portal.
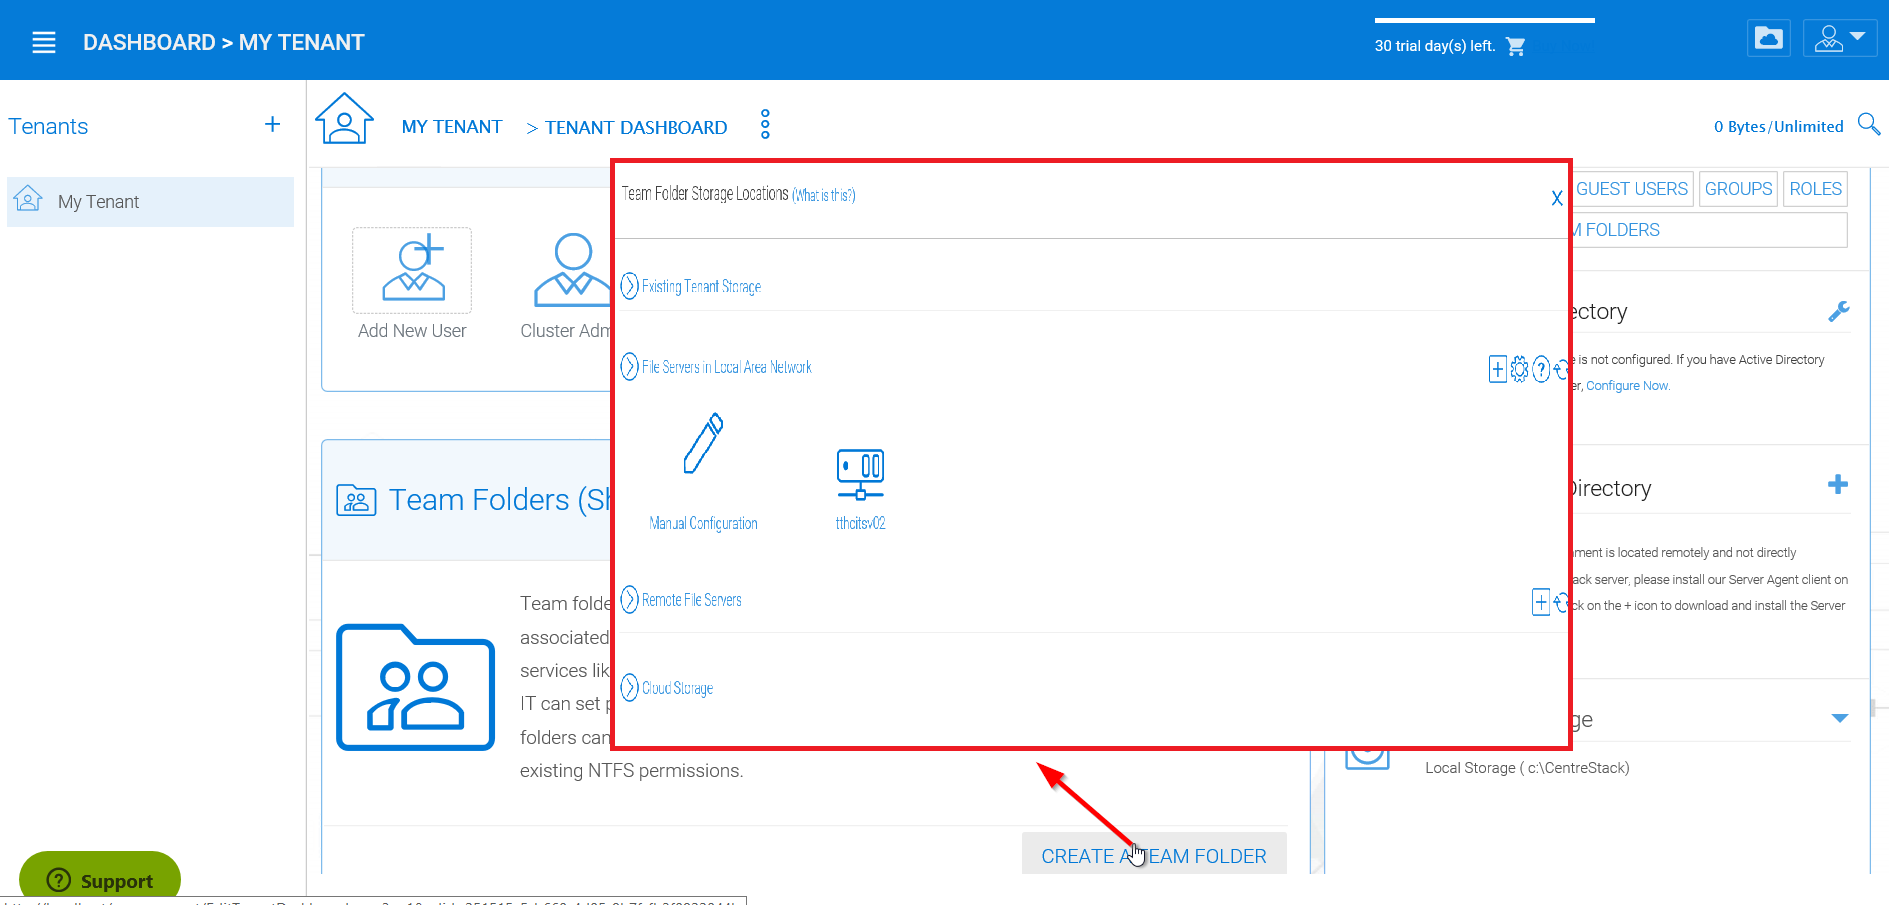
TEAM FOLDER STORAGE LOCATIONS
Files and Folder Permission
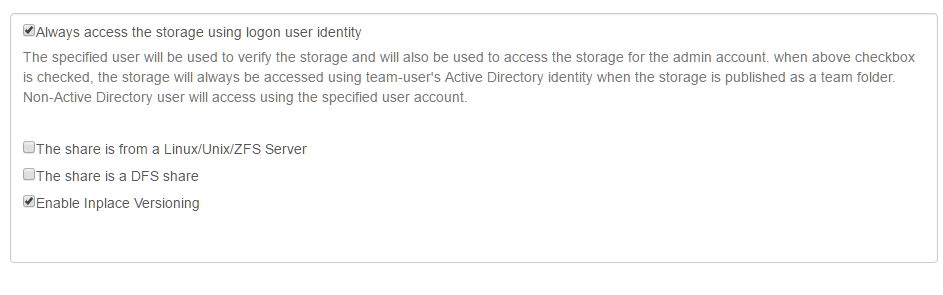
If your files and folders are on a file server in the same Local Area Network (LAN) as the CentreStack server, the best way to manage file and folder permission is to delegate it 100% to the NTFS permission. In the “Storage Manager”, when attaching local storage, there is an option “Always access the storage using logon user identity”, This option can be used to delegate file/folder permission check directly to NTFS.
FILE AND FOLDER PERMISSIONS SETTINGS
If you are not using native NTFS permission. For example, you are on cloud storage services such as Amazon S3 or OpenStack Swift, you can use CentreStack folder permission.
MANAGE FOLDER SETTINGS
Setting up Active Directory
When the Active Directory is in the Local Area Network (LAN), LDAP can be used to connect to the Active Directory. There are several cases here,
- Sometimes you want the user account to be automatically provisioned so it is easy for the administrator.
- Sometimes you want the user account to be limited to a specific AD group, but still automatically provision the user’s account when the users are in the AD group.
- Sometimes you want the user account to be limited to a specific Organization Unit.
AD account auto provision
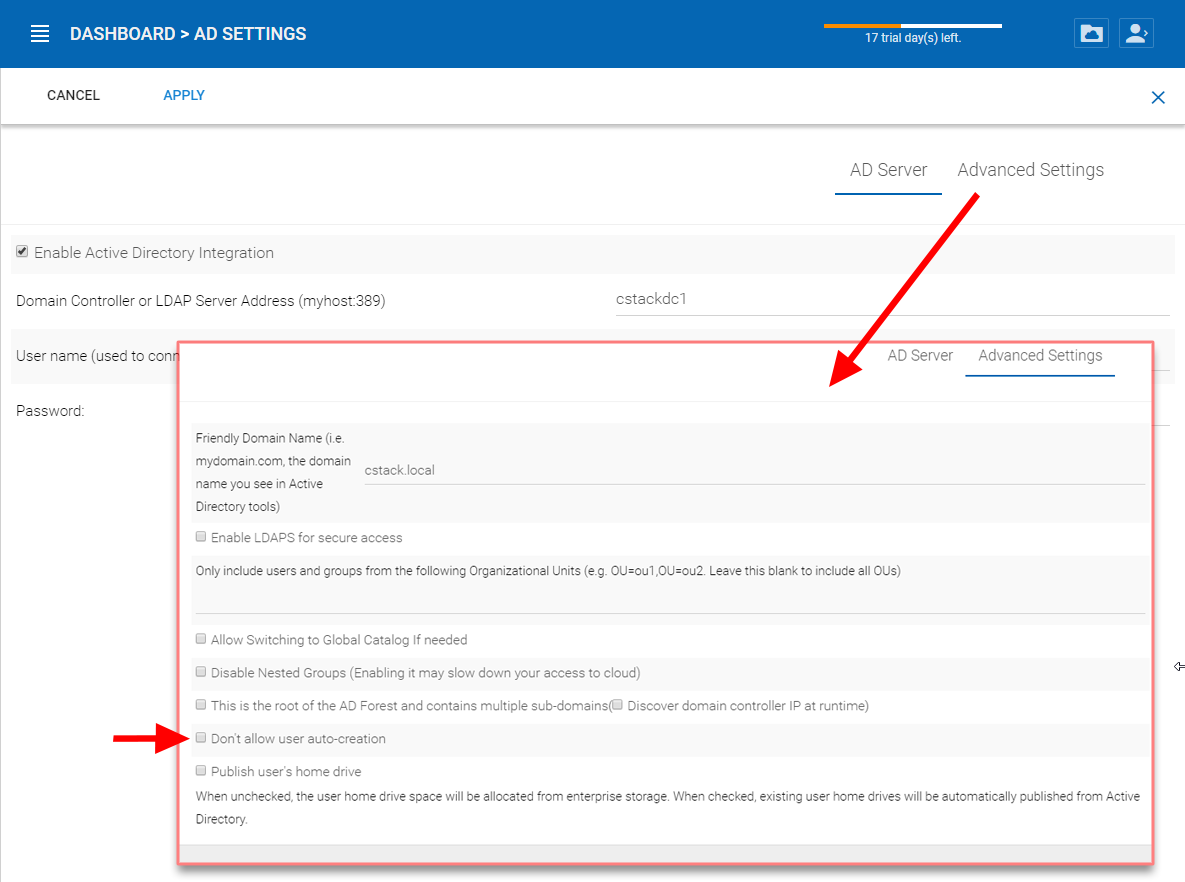
This is the default setting in the Advanced -> Active Directory Settings.
As long as the “Don’t allow user auto-creation” is not checked, Active Directory users will be allowed to go to the web portal and log in. The first time the user logs in, its CentreStack account will be automatically provisioned.
USER AUTO-CREATION SETTING
AD account auto provision, limiting to Organization Unit
The organization unit field can be used to further limit the Active Directory user account that can be automatically provisioned.

LIMIT TO ORGANIZATION UNIT SETTING
The format of the organization unit is the OU’s distinguishedName minus the DC suffix.
For example, the following OU’s property is: distinguishedName => OU=tenant11,DC=tsys,DC=gladinet,DC=com
when it is put into the OU field, the DC suffix can be removed so only OU=tenant11 is required.
Note
OU=tenant11

OU PROPERTY LOCATION
AD account auto provision, limiting to a specific AD group.
From the user manager, you can import the AD group and the users in the AD group will be able to get the account automatically provisioned.

MIGRATING USERS FROM ACTIVE DIRECTORY
Here is a demo video for Import AD group.
Setting up Offline Folder
In a team collaboration environment, there are several best practices related to offline folder management.
Here are several parameters for consideration:
Team Folder Offline Settings
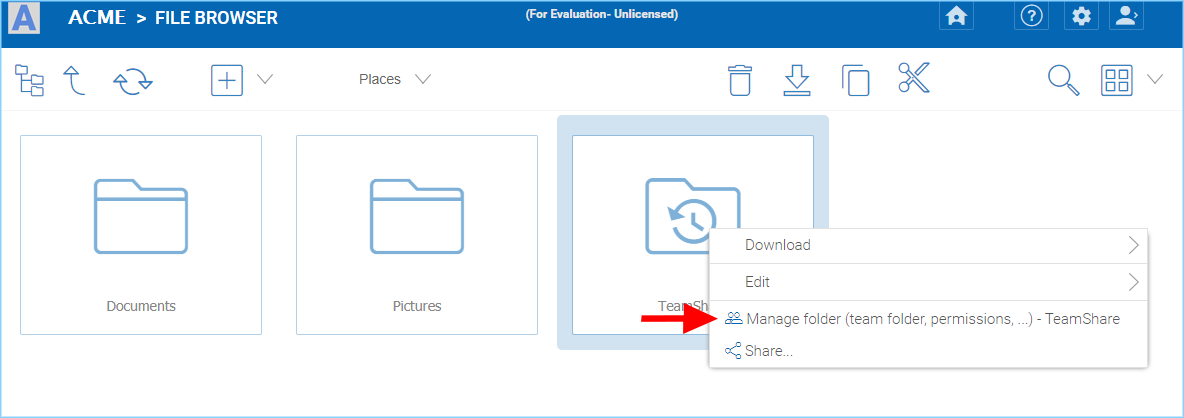
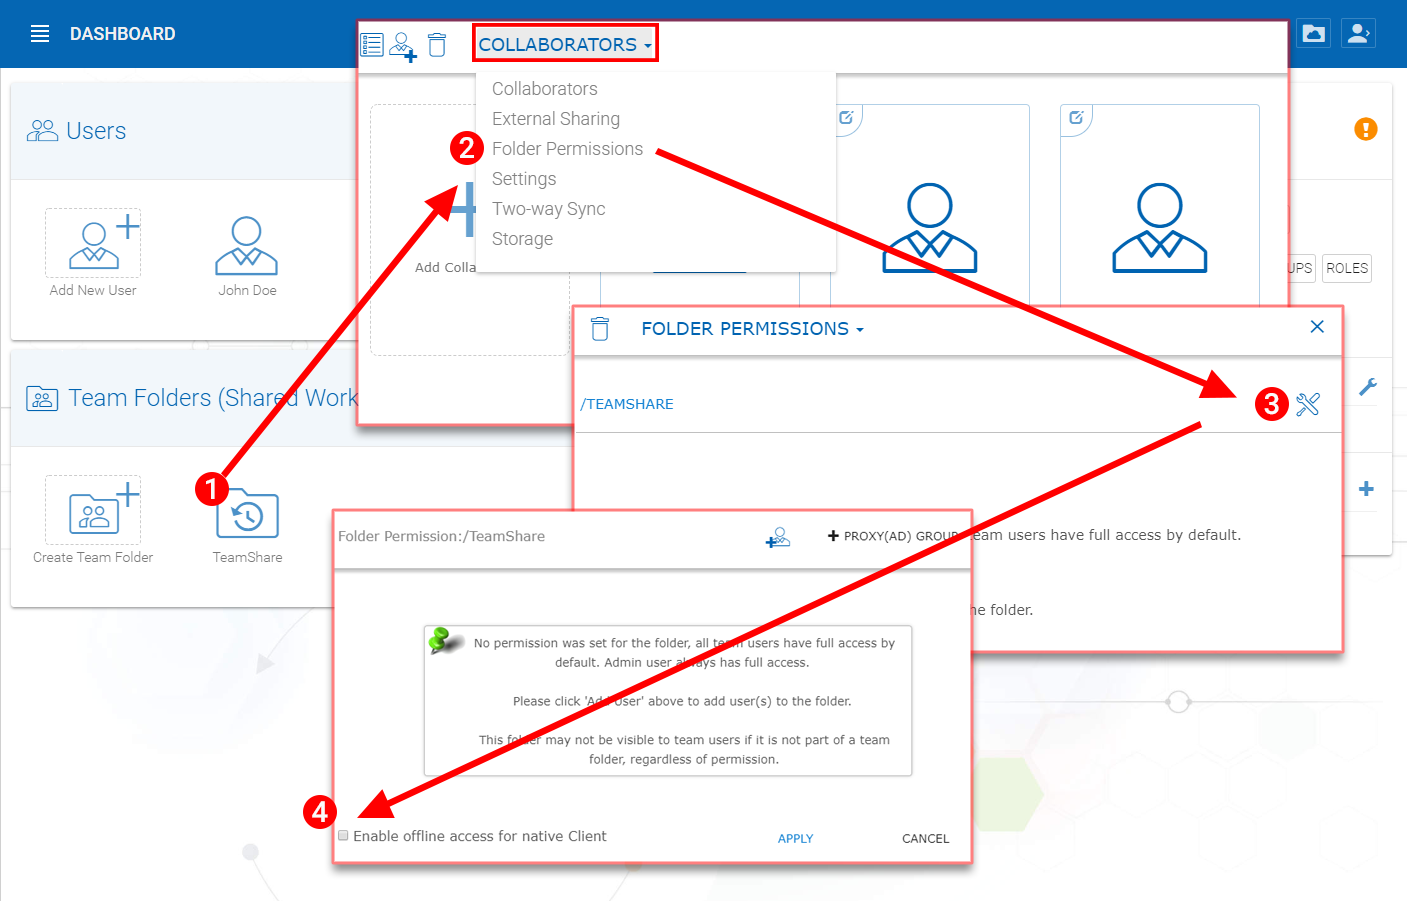
If you have a big team folder or several team folders that are quite big, it is not a good practice to enable the team folder offline from the root. Instead, you can choose not to enable offline or just enable a subset of sub-folders that are relatively small and at the same time, used more often. If you want to enable a subset of sub-folders within team folders for offline access, you can start by going to the folder permission section. You can access this by selecting the folder (1), in the pulldown menu (2) select “Folder Permissions”, then select the edit settings icon (3) and finally select “Enable offline access for native Client” (4), and apply the change.
ENABLING OFFLINE ACCESS FOR NATIVE CLIENT
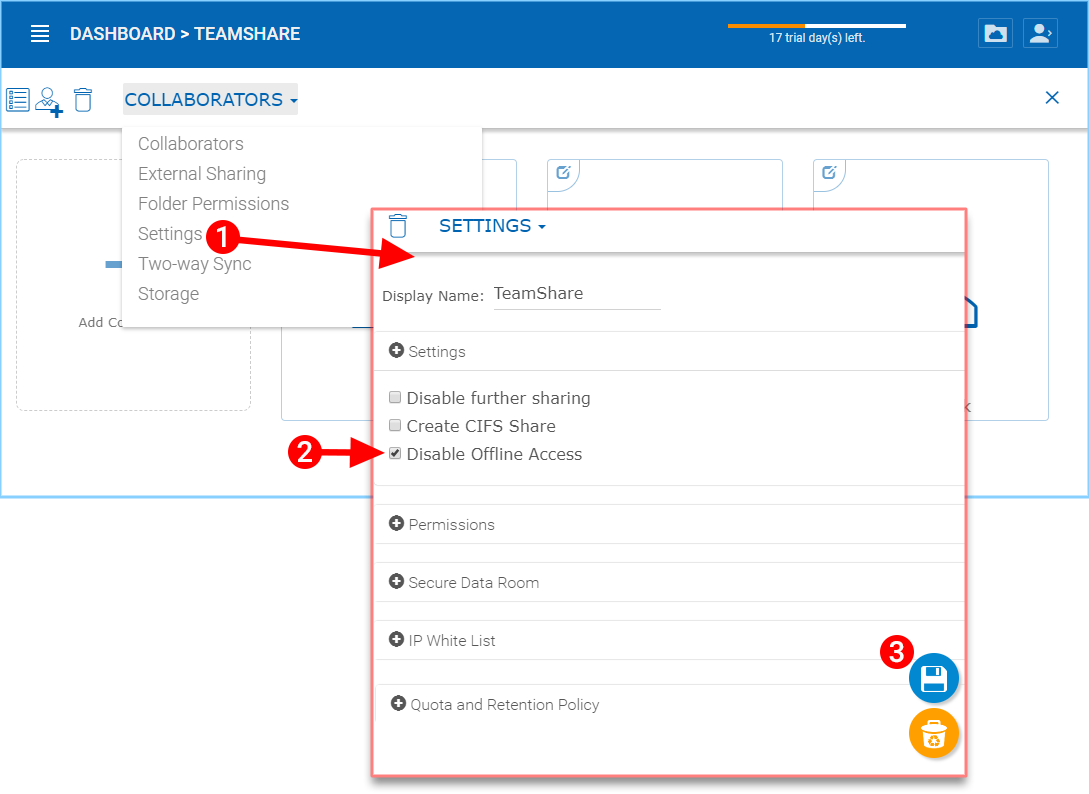
If you want to disable offline access for the team folder completely, you can change the setting from the Team Folder section by choosing the “Settings” option below (1) in the drop-down menu and selecting the “Disable Offline Access” option (2). Don’t forget to save your changes (3).
DISABLING OFFLINE ACCESS FOR TEAMSHARE
User Offline Settings
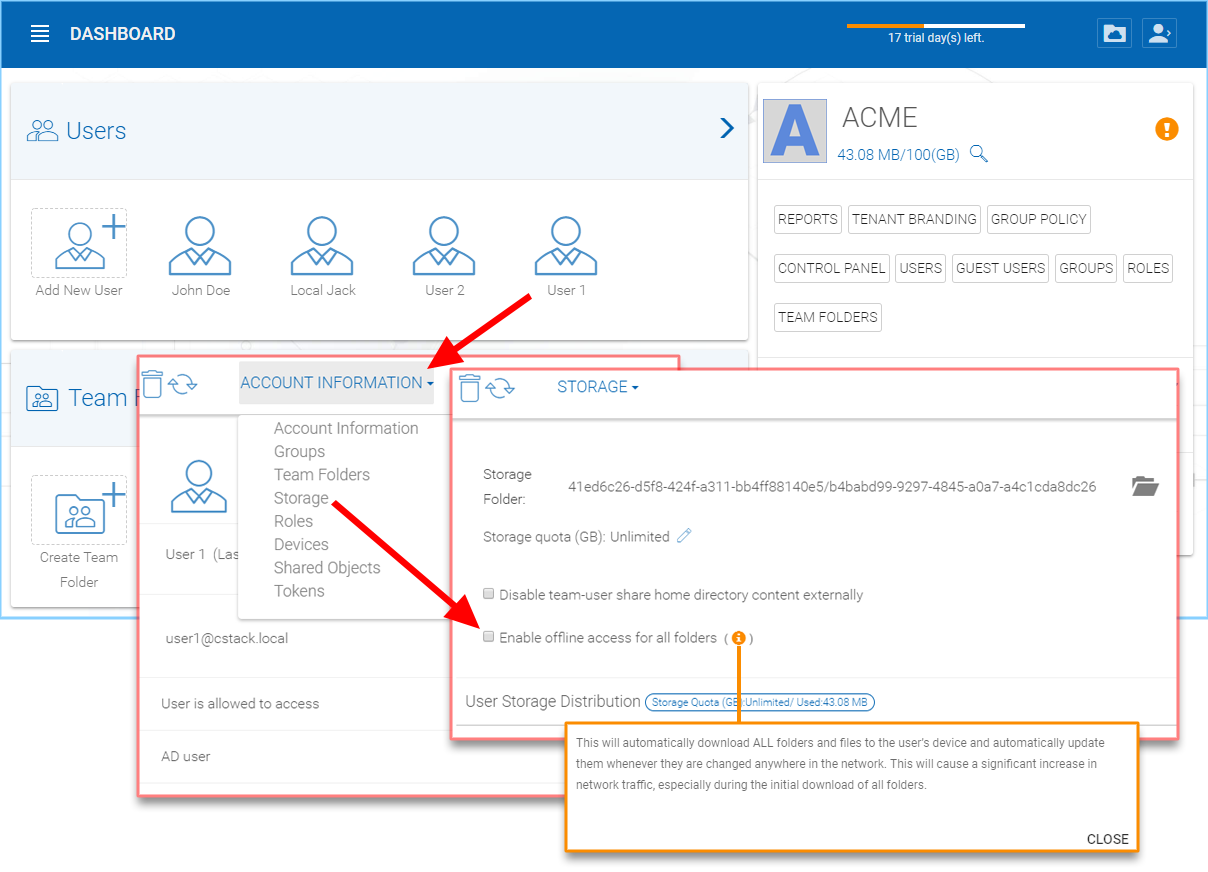
Upon creating users in the CentreStack system (including users imported from Active Directory), there is an offline flag upon user creation.
Normally, we don’t recommend checking the “Enable offline access for all folders” flag, because it will try to download every single file for the user when the user is connected, which can use a lot of bandwidth and slow things down.
ENABLING PER-USER OFFLINE ACCESS
Note
This will automatically download ALL folders and files to the user’s device and automatically update them whenever they have changed anywhere in the network. This will cause a significant increase in network traffic, especially during the initial download of all folders.
Without it, the user can still pick and choose which folder to mark as offline.
User Manual Offline Settings
During regular usage of the files and folders, users can mark folders as offline.
ENABLE OFFLINE ACCESS AT THE CLIENT LEVEL
Summary
Administrators can manage the tenant-wide offline policy related to team folders and users. In the case where team folder size is small and user size is small, an administrator can enable the offline flag to push files and folders to user’s devices.
However, in the case where the team folder size is big and the user number is not small, we recommend the administrator enables as few offline flags/settings as possible on the administration side. Users can still do offline management themselves within their working folder on a case-by-case basis.